Difference between revisions of "Weir (Thomson Weir / V notch sharp crested weir)"
Jump to navigation
Jump to search
| Line 3: | Line 3: | ||
==Method:== | ==Method:== | ||
| − | |||
==Equipment:== | ==Equipment:== | ||
Revision as of 00:18, 8 August 2007
Parameter to be measured:
Discharge of open channels
Method:
Equipment:
- Weir (concrete, wood, metal)
- V notch weir plate (stainless steel)
- Water Level Sensor:
- Bubble Sensor
- Shaft Encoder
- Radar Sensor
- Pressure Sensor
- (Capacity Sensor)
- Time
Construction:

- Planning: Before you can build a weir, you need permissions from different institutions. In my case (Bavaria, Germany) I needed permissions of following people:
- Owner
- Fishing rights
- District office
- Nature conversation agency
- Water right agency
It took quite a while (around three month) although the adminstration was helpful. I heard that it can take much longer. So start the administration stuff as soon as possible. Especially if the river falls under the nature conservaty right. possible.

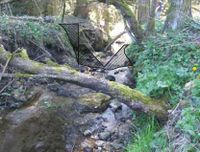
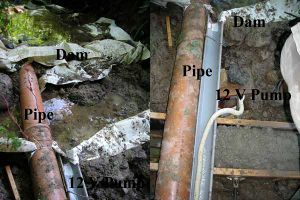
- Accumulation and Drainage of the water: Before starting the construction of the weir, I accumulated the water in front of the construction site and then drained the water around or over the weir. If you have electricity you can use pumps (dirt water pumps). But be sure that the pumps can runover night, because the concrete has to dry at least twelve hours. Use at least two pumps, because it is a little tricky that all the water is pump away and that the pumps are not running dry. One big pump for most of the water and the other for the adjustment. In the case you don't have electricity, you can build one or two small temporary dams and then use a pipe to drain the river water over the weir. I think it is saver, because you don't have to relay on the pumps. I used a 12 V pump to get the water away which was leaking through the dam, so I could opparate the pump with a battery.
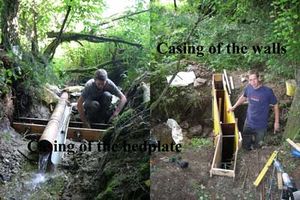
- Digging: The Thickness of the walls and the depth of the bedplate depends on the expected discharge. I digged around 30 cm deep for the bedplate and in the bank walls 1 m.

- Casing and Placing the Concrete:I have done the casing and the concreting in two steps: First I build the bedplate and then later on the walls of the weir. For the connection of both parts I used some construction steel. For the ease of installation I used casing boards and construction steel screws. With these I could easily define the thickness of the walls. First, I build only the casing for the bedplate, because I have to compact the concrete. I used also some construction steel for reinforced concrete. After the casing and the steel construction for the bedplate is finished, I started placing the concrete in the casing of the bedplate. The proper mixture for the concrete is 300 kg cement, 900 l water and 1800 kg aggregate. I used a mixture of 1 to 3, because I think the concrete sets faster, but about this I am not sure. I always placed only a little bit concrete in the casing and compacted the concrete. After I filled the casing, I just started building the casing for the walls and I used also construction steel for the concrete. After twelve hours the concrete was hard, so I started concreting the walls. After two days I removed the casing
- Installation of the Water Level Sensor
- Installation of the Weir Plate
Advantages:
Disadvantages:
What to watch out for:
Problems/Questions:
Links
Projects that used the above equipment:
Other related web sites: